Honey production starts when field bees collect nectar from flowers. You may notice some of your bees returning from the field with what appears to be a swollen abdomen- this is the nectar.
Back in the hive, the field bees share their nectar with the worker bees and the transformation to honey begins.
Bees add enzymes to the nectar. These enzymes are converted into complex sugar molecules and added in a process of sharing and regurgitation.
The next step is to reduce the water content of the nectar, this is accomplished by evaporation, bees use their wings as fans to increase airflow and enhance evaporation.
Once the water content is reduced to approximately 17%, the honey is capped, the cells are now sealed. Modern beehives are constructed into movable frame hives to make harvesting easy.
Table of Contents
What you will need for the harvest
While honey extractors are important, you’ll also need to secure a few other things in order to effectively harvest your honey. For instance, you’ll need to get a hold of various tools for uncapping the cells.
If you’ve already done this before, then you’d know why it’s necessary to uncap honey combs first before placing them inside the extraction chambers. You can easily purchase these uncapping tools at any beekeeping equipment retailers. If you’re resourceful enough you can actually use manual uncapping forks or knives but if you want to do things faster, then it’s best for you to choose electrical knives or hot air guns.
Below are the tools you’ll need to get started extracting honey:
- A honey extractor – to extract the honey.
- A hot knife – to cut off the wax cappings.
- A strainer – make sure it’s clean with fine pores.
- A bucket – to collect the extracted honey.
- A cookie sheet – to collect the sliced off wax cappings.
- A measuring cup – to pour the honey into the jars.
- Honey jars – to store your honey.
Any hardware or beekeeping store will have these supplies. Also, I recommend using glass jars with tight lids instead of plastic.
Honey extractors come in a variety of sizes and designs. Some honey extractors are designed to extract honey from large or small frames. Some can hold several large frames tangentially or multiple small frames radially.
You can see how this works in the video below. When the baskets are spun at a relatively high-speed, the centrifugal force throws the honey out of the cells on the outside of the frame.
When is it the right time to harvest honey?
You will know it’s time to harvest your honey when your bees have completely filled all the honey supers with honey and capped the honeycomb.
They cap it with a white wax when they’re done packing in the honey; it’s their way of storing the honey.
So when the frame is partially capped you know it’s not ready for extraction. You may want to wait until both sides of the frame have been completely capped before harvesting the honey.
Preparation For the Harvest
Once you’ve chosen a site for the harvest, place the honey extractor in a location that is free of any impediments so you can move around it easily. Also, put a bucket under the valve in preparation for collection of the honey as it will flow out easily.
Place your strainer over the bucket so that the honey is filtered immediately it comes out of the valve. Close by, arrange the cookie sheet and hot knife or hot air gun for easy access when you need it.
Below are all the important steps to take for a successful harvest.
Step 1 – Choose a location and collect your honey frames
The first thing you want to do after gearing up and setting up all your equipment is to collect your fully-capped frames from the beehive.
You can do this a day before the actual extraction so that the bees will slowly return back to the hive. Bees are really good at tracking down their own honey when it’s close to the hive. So you want to make sure that the extraction is a bit of a distance from the hive.
The best place to do the extraction is indoors and away from the bees. The garage is a nice location as you don’t want honey spills inside your living area. If you do attract bees, you can sleep easy knowing that you won’t get stung while sleeping.
It’s not that you can’t do the extraction outdoors, but to avoid swarms of bees trying to get to the honey, doing it indoors is a better choice.
Step 2 – Remove the bees from the supers
After extracting the supers from the hive, you should remove the bees from the supers and move the supers into a warm room. To remove the bees, use a gentle soft bee comb to brush the bees off.
Remove each capped frame one after the other and brush or blow the bees away. Be careful when brushing them off, you don’t want to harm the bees so take your time at on this point until all the bees have come off.
Step 3 – Remove the wax caps from the cells
The next step in this part of the process is to remove the wax caps from the cells with a hot knife or hot air gun. This can easily be achieved with the right tool.
What you’ll remove is pure beeswax which can be separated from the honey and melted into beeswax blocks. You can also use a device called uncapping scratcher useful for removing small capped areas. When you’re done with uncapping the frames, you can load it into the honey extractor.
Be careful when uncapping the wax comb, if you’re too eager, this could damage the comb. The trick is to focus on slicing just the top to expose the honey.
Remember, honey flows best when the temperature is warm. You can increase the temperature by moving air through the supers. With the honey warmed,you’re ready to extract.
Step 4 – Place the frames in the drum
Now you are ready to start, you should place the frames in the slots inside the drum. Then set the extractor to a slow speed as excessive force could damage the comb. We have to be careful with the speed so that the force is adequate but not too much.
As it spins, you will see the honey streaming from the comb down the sides of the extractor.
Once one side is partially extracted, you should flip the frames to extract honey from the other side, now you can run the honey extractor faster as there is less honey in the frames, I usually do one more flip and do a final high-speed extraction on the first side. The honey collects in the bottom of the extractor and flows out the gate.
Step 5 – Filtering and storage
At this point, the honey will be filled with pieces of wax and pollen – this is where the filter comes in handy to remove these impurities while the honey flows into a bucket below
The honey will require a final filtering and to accomplish this, let it settle for 24-48 hours. After that, pour the honey through a special filter to remove any small particles of wax or pollen combs left over.
After settling for a day or two, most of the wax would have floated to the top of your pale or drum. So use a valve with a filter for easy storage. Before storing, I usually do a final moisture check with my refractometer to make sure my honey is less than 17.8% moisture.
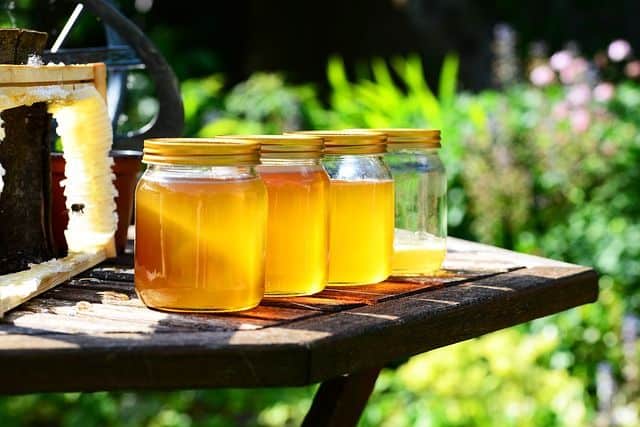
Finally, the honey is ready to bottle. This is pure organic honey. The type of honey you would buy at a store specializing in organic foods.
How to Choose The Best Honey Extractor For Your Needs
There is a wide range of honey extractors to choose from. It’s important that you choose the best honey extractors possible based on the number of combs you are planning to extract the honey from.
Two of the most common types of honey extractors are classified as either radial or tangential extractors. The difference between these extractors is how the frames are assembled inside the basket.
Although both kinds of devices serve the same purpose, they differ in how each of their frames is positioned in the extractor basket.
Radial honey extractors have frames that are positioned inside the basket with the top side facing outwards. On the other hand, the tangential type of honey extractor have frames that have only one side of the frame facing outwards.
Compared to the latter type of extractors, the radial honey extractors would require less amount of energy to operate. For that reason, these extractors are more often used for commercial purposes.
Size of the extractor
Honey extractors come in a variety of sizes. Larger extractors are basically intended for commercial uses while the smaller ones are ideal for small-scale businesses.
Usually, commercial honey extractors can hold as much as 60 frames at once. This allows you to extract gallons of honey in no time. However, the smaller types of honey extractors can hold up to 3 to 8 frames at once.
However, regardless of which type of honey extractor you choose, you’ll have to make sure it suits the purpose as well as your budget.
Manual or electric
You should consider the number of frames that you will be processing at once when choosing between a manual or electric extractor. This simply means the amount of honey you plan to harvest. It’s safe to say that if you are planning a small harvest, there is no need for a big or expensive electric honey extractor.
A small manual machine will do a good job and will be good enough to start your beekeeping hobby or business. When production increases, you can get an electric extractor to save time and keep the manual one as a spare – just in case.
How to Clean and Maintain a Honey Extractor
Honey extractors don’t come cheap and to keep them functional for a long time you have to maintain them just the way you do other expensive equipment that you own.
Every beekeeper knows that proper cleaning and maintenance of their beekeeping equipment will guarantee long-term use as well as the ability to produce uncontaminated honey.
The extractor is especially important since this is where the honey passes through before bottling and distribution. This makes it all the more crucial to ensure that the extractor is spick and span at all times.
Don’t leave your extractor out in the open for the bees to clean it. This is one bad advice that has taken root in many bee forums. If you don’t want to spread diseases in your colony or end up with a rusted extractor damaged from the elements, then you should make sure you thoroughly clean and store in a dry place after use.
Before cleaning, make sure that the honey valve is properly closed. Then place the equipment on a steep angle so that any leftover honey flows out through the gate.
You should leave the extractor in this position at a warm temperature for a few hours or a full day at least before you begin cleaning.
When you are ready to clean, you will find more honey collected at the bottom of the extractor. Now open the valve and drain the last of the honey. There will be some wax and pollen, so it’ll be suitable for consumption at home.
Clean out all the wax and pollen from the inside of the extractor then fill the equipment with water and leave it for 24 hours.
After 24 hours, pour out all the content of the extractor and rinse again with water. With a clean cloth, mop up the inside.
To avoid rust on the lower bearings, cover it with a plastic wrap to keep it away from moisture and prevent rusting during the cleaning.
Once your done cleaning, wipe down the extractor and store it in a clean dry place remember to always keep the bearings and gearbox protected from water.
Steve's experience in beekeeping is extensive, having managed numerous hives and colonies of bees throughout his career. He is well-versed in all aspects of beekeeping, from hive management and bee behavior to honey production and bee health. Steve is also an advocate for sustainable beekeeping practices, using natural and organic methods to maintain healthy hives and protect the environment.
As a seasoned beekeeper, Steve has also shared his expertise with others by teaching workshops and classes on beekeeping. He is a sought-after speaker and has been invited to speak at conferences and events across the country.
With his wealth of knowledge and experience, Steve is a valuable resource for anyone interested in beekeeping. Whether you are a seasoned beekeeper or just starting out, Steve's insights and advice can help you become a successful and responsible beekeeper.