Last Updated: 24 July 2026
Table of Contents
Everything you need to know about Bee Smokers
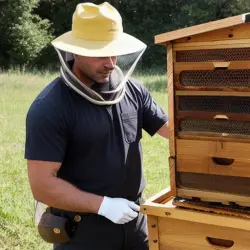
Bee smokers are an important part of every beekeeper’s toolkit. Even if your bees are gentle, a bee smoker is a good way to calm them down every time you open the hive.
It can also be used to stop them from becoming too hostile towards their keeper. Because bees can be deadly to some people, extra care must be taken and bee hive smokers can help you take the right precautions.
Bee smokers help beekeepers perform regular everyday hive inspections without fear of being attacked by their bees. Using the smoker is also good for the bees when compared to other conventional methods, like using fire which may kill them or drive them away from the hive permanently.
How Does a Bee Smoker Work?
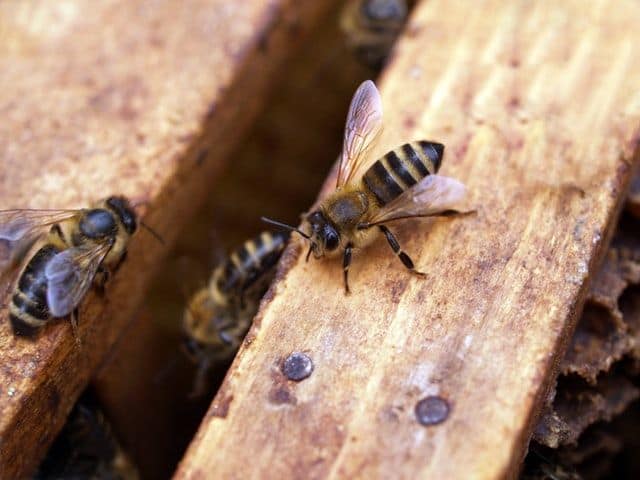
Bees are aware when people are near their hive. The guard bee emits a substance that triggers other bees instincts into wanting to protect their hive. So because of the calming effect of the smoke, they feel safe allowing the beekeeper to work efficiently- whether you are harvesting honey or simply doing routine beehive work.
There is no guarantee that a beekeeper won’t get stung, but the bee smoker reduces the chances by a huge margin.
Smoking your bees achieves two things.
Disguise Pheromones
First, the smoke disguises the pheromones emitted by the guard bees- particularly the “Alarm Pheromone.” This specific pheromone is emitted when bees are frightened, surprised or injured.
For instance, when you squish a bee, you instantly set off a small alarm pheromone so that other bees in the hive who smell the pheromone, will become more aggressive and equally emit the same type of pheromone to warn others – this goes on and on.
In only a few minutes, the colony could become organized and attack you. Having a bee hive smoker handy to mask the pheromones ensures that even if you frighten/squish a bee or two, you won’t have a swarm of cranky bees attacking you.
Start a bee safety protocol
Smoke also simulates a forest fire protocol where bees all go to their honey stockpile and start eating up loads of honey. The idea behind this bee fire drill is that when they are full, they will be well equipped to flee their burning home and start a new hive elsewhere if the need arises. Also, that is the only way they can take their most precious possession with them if a fire erupts.
So when the bees rush to feed, the beekeeper can focus on the work at hand. Once done, the bees will realize that there was no fire, and settle back into regular colony life. Besides, just like humans, bees aren’t so feisty after a big meal.
Now that you know how useful a bee smoker is, let’s look at one important factor – smoker fuel.
Types of Fuel For Bee Hive Smokers
For bee hive smokers to work properly they need fuel. There are several things that can be used as fuel and all of them are easily obtainable, so long as you know where to look. Some common smoker fuels include:
- Dried leaves
- Hay or dry long grass
- Wood shavings
- Dry grass mowings
- Egg trays
- Wood or bark chippings
- Newspaper
- Hessian fabric
- Touchwood
- Dried pine needles
- Wood or bark chippings
- Corrugated cardboard (rolled very tightly)
You can classify bee smoker fuels into three basic types, “starters” “kindling” and “fuel”. This might seem a tad bit technical for what simply is a fire in a can, but categorization will help you choose the most suitable fuel for your needs.
Starter – Fast ignition, short burn
Starters are those items that can be lit easily, and burn for longer – long enough for the kindling to catch. Examples are newspapers, cardboard, and pinecone.
The idea is that when you light your starter and throw it in the can, you can immediately start placing the kindling on top. No matter your choice, you want to ensure there are enough air pockets inside so that the fire does not get smothered.
Kindling – Fast ignition, medium burn
This is the second step and includes a small, thin piece that can light easily. Pine needles are a popular choice for kindle fuel. Some beekeepers use wood shavings, dried leaves, straw and even pet store hamster beddings will do the job.
Some bee suppliers will provide what essentially amounts to laundry lint just for the sole purpose of kindling. Please don’t use your own laundry lint as synthetic fibers from our clothes will melt and not burn. This can cause nasty fumes that will achieve the opposite.
Fuel – Slow ignition, longlasting burn
Finally, your smoker fuel can be stuff like larger pieces of wood, twigs or wood chips. Basically, some beekeepers use a starter material that’s hot and burns on its own, then add some pieces of kindling to get the fire going, and finally add logs to achieve a long-lasting fire.
Fuel typically takes longer to catch fire, and will take a little more effort to get an even burn without a starter or kindle. But generally, they will burn for longer and ensures that the smoker does not go out midway during use.
Using Your Bee Smoker
A smoker can sometimes be complicated to use. For example, knowing how much smoke to use and what is too much can be a bit tricky for some new beekeepers. Below is all the information you’ll need to operate your bee hive smoker.
The basic idea behind a bee smoker is to start a small fire at the base of the bee hive smoker, and gather different fuel types on top of it to enhance the smoke. Because heat increases, if we pack it all at the bottom and light the top, it will only burn for a few minutes and then go out. This will not be suitable in igniting the fuel beneath it or sustaining a long lasting fire.
Step 1 – Light the starter
Start with an empty bee smoker and use a grill lighter or matches to ignite your starter fuel or a small amount of kindling. If using a regular matches, light it first and if it does not go off, place it in the can carefully. You don’t want to drop it in too fast as it could put out the fire even before it even starts.
Step 2 – Add some kindling
Blow the freshly lit fire for a few times to get the fire going well and then add some kindling. Pack it down with a safe instrument like your hive tool. Be careful not to pack it too vigorously so you don’t snuff out the fire.
Step 3 – Add some fuel
Continue pumping the bellows and adding more kindling until you have a nice little fire burning, then go ahead and begin adding in larger pieces of the fuel to get a longer burning smoker.
The key here is how much you pack down the fuel. Too much and the fire will go out and if you pack just a little, it will burn too fast and go out.
Experience and skill is actually the best way to know how to pack it right. However, many newbies make the mistake of not packing the fuel tightly from the beginning.
If badly packed and your bee hive smoker goes out during use, it will most certainly be because you ran out of fuel and not that you didn’t pack it well enough.
When this happens and there is still fuel left in the smoker, then you either packed it too much or too little and didn’t get a good burn from the start.
If done right, the bee hive smoker will burn well and can last a good long time on its own. It will need the occasional puff on to help ensure it is burning.
Step 4 – Puff some smoke
Bee hive smokers can get extremely hot! Most smokers have what looks like a wire protection cage around the main can, but it can be difficult to hold them this way because your finger could slip in through the openings. The best way to handle it is to hold the smoker by the little hook in front or by the bellows.
Never pick up a bee smoker by the lid handle or by grabbing the can itself. Also, remember that the bottom will get very hot so don’t set it on top of or next to anything that can melt or burn.
As you use the smoker, bear in mind that you’re not going out to attack your bees, but rather you are doing it to keep the bees as well as yourself safe. When you open the entrance of the hive, use a few puffs so you can get on with your business.
You will notice that the bees are agitated at first, but don’t worry because this is simply their first reaction. Release the puffs in intervals of 3-5 minutes just to let them believe that danger is still around. When you release the puffs, hold it about 10 inches away from the hive and try not to overdo smoking.
For an up-to-date list of the best bee smokers, read our buyer’s guide!
Steve's experience in beekeeping is extensive, having managed numerous hives and colonies of bees throughout his career. He is well-versed in all aspects of beekeeping, from hive management and bee behavior to honey production and bee health. Steve is also an advocate for sustainable beekeeping practices, using natural and organic methods to maintain healthy hives and protect the environment.
As a seasoned beekeeper, Steve has also shared his expertise with others by teaching workshops and classes on beekeeping. He is a sought-after speaker and has been invited to speak at conferences and events across the country.
With his wealth of knowledge and experience, Steve is a valuable resource for anyone interested in beekeeping. Whether you are a seasoned beekeeper or just starting out, Steve's insights and advice can help you become a successful and responsible beekeeper.