Are you a beekeeper looking to expand your colony? Or maybe you’re just starting out and want to build your own hive from scratch? Either way, understanding how to make beehive frames is an essential skill for any beekeeper.
Beehive frames serve as the foundation for the honeycomb and provide structure for the bees to build upon. In this article, we will guide you through the process of making your own beehive frames step-by-step, so you can provide a safe and secure home for your bees.
To get started, you will need a few tools and materials. First, you will need a saw to cut the wood, and a drill to pre-drill holes for the nails or screws. You will also need a hammer or screwdriver and nails or screws to assemble the frames.
In terms of materials, you will need wooden boards, preferably untreated pine or cedar, that are at least 1 inch thick and 2 inches wide. You will also need foundation wax or wire to provide support for the honeycomb.
With these tools and materials in hand, you’re ready to get started on making your own beehive frames.
Table of Contents
Key Takeaways
- Beehive frames are essential for providing a safe and secure home for bees to build honeycombs.
- Pine wood is a good choice for making beehive frames, and there are different types of frames available, such as wooden frames with wax foundation, plastic frames, and foundationless frames.
- Measuring, cutting, assembling, and wiring the frames properly is crucial for their longevity and the productivity of the bees.
- Regularly inspecting and maintaining the frames is important for the health and productivity of the bees, and safety measures should be taken during the construction process.
Understanding the Purpose of Beehive Frames
It’s important to understand the purpose of beehive frames so you can properly care for your bees.
There are many benefits of using beehive frames, including providing structure for the hive, making it easier to inspect and maintain, and increasing the amount of honey that can be harvested.
There are also different types of beehive frames available, such as wooden frames with wax foundation, plastic frames, and foundationless frames. Each type has its own advantages and disadvantages, so it’s important to research and choose the one that best suits your needs.
With this knowledge, you can move on to gathering the necessary tools and materials for making your own beehive frames.
Gathering the Necessary Tools and Materials
To get started with making beehive frames, you’ll need to gather some essential tools and materials. The first step is to select quality materials such as pine wood, which is strong enough to withstand the weight of honeycombs and resistant to bee stings.
You’ll also need to make sure you have the right tools, including a saw, hammer, nails, gloves, and safety goggles. Before you begin, it’s important to prepare the work area and take safety measures.
Clear the area of any debris or clutter, and make sure you have enough space to work comfortably. Wear gloves to protect your hands from splinters and bee stings, and safety goggles to protect your eyes from flying wood chips.
With these basic tools and materials in place, you’re ready to move on to the next step of measuring and cutting the wood.
Measuring and Cutting the Wood
Now that you’ve got all the necessary tools and materials, you’ll want to measure and cut the wood to the exact dimensions needed for your hive. Using woodworking techniques, carefully measure each piece of wood before cutting to avoid any mistakes that could compromise the integrity of your frames.
Here are some tips to get you started:
-
Begin by measuring the length and width of the hive body. This will allow you to cut the side bars to the correct size.
-
Cut the top and bottom bars to the same length as the side bars.
-
Use a saw to cut a groove in the top and bottom bars so that the foundation can fit snugly into the frame.
Remember to always prioritize beekeeping safety when handling sharp tools and equipment.
Once your wood is cut to the correct dimensions, you can move on to assembling and wiring the frames for your beehive.
Assembling and Wiring the Frames
Once the wood has been cut to the correct dimensions, it’s time to put together and wire the frames for the beehive. Assembling the frames is a relatively straightforward process, but there are a few frame variations to consider. The most common type of frame is the groove and wedge, which consists of four pieces of wood that are joined together at the corners with a wedge. A variation of this frame is the split bottom bar frame, which has a split bottom bar that allows for easy removal of honeycomb.
To assemble the frames, start by laying out the pieces of wood on a flat surface and attaching the wedge to one end of the bottom bar. Then, fit the side bars onto the bottom bar and attach the top bar with a nail or staple. Once the frames are assembled, it’s time to wire them. Wiring the frames involves running wire through the frame and securing it with eyelets. This helps to prevent the honeycomb from falling out of the frame. When wiring the frames, it’s important to make sure the wire is taut and evenly spaced.
When it comes to maintenance tips for beehive frames, it’s important to regularly inspect the frames for damage and replace any that are broken or warped. It’s also a good idea to clean the frames before placing them back in the hive to prevent the spread of disease. With the frames assembled and wired, you’re now ready to move on to the next step of finishing and installing them in your hive.
Finishing and Installing the Frames in Your Hive
Completing the final step of the beehive frame construction process involves putting the finishing touches on the frames, readying them for installation in the hive and ensuring your bees have a sturdy and safe home.
To begin, inspect the frames for any rough edges or splinters that could harm your bees. Sand down any rough spots and make sure the joints fit tightly together.
Next, it’s important to choose the proper foundation for your frames. There are several types of foundation available, including plastic, beeswax, and wired. Each has its own benefits and drawbacks, so it’s important to research and choose the one that best fits your needs.
Once you have chosen your foundation, insert it into the frame and use wire to secure it in place.
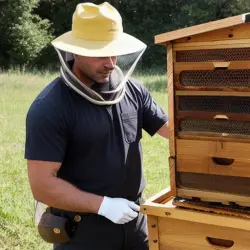
Finally, install the frames in your hive, making sure they are level and securely fastened. Proper installation and maintenance of your beehive frames is essential to ensure the health and productivity of your bees.
Frequently Asked Questions
How long will the beehive frames last?
To ensure the longevity of your beehive frames, it’s important to maintain them properly. Regular inspection, cleaning, and replacement of damaged frames are key. With proper care, frames can last for several years.
What types of wood are best to use for beehive frames?
Looking for the best wood for your beehive frames? Consider the hardness and durability of woods like cedar or pine. Treatment options, such as wax or paint, can also prolong their lifespan. What’s your preferred choice?
How often should beehive frames be replaced?
Beehive frame lifespan is influenced by hive type, climate, and bee population. Inspect the frames for signs of damage, rot, or wax buildup. Replace when necessary to prevent disease and maintain colony health.
Can beehive frames be reused after the honey has been harvested?
"Before reusing beehive frames, weigh the pros and cons of using plastic vs. wooden frames. Wooden frames offer benefits like natural wax production while plastic frames are durable. Reusing frames saves money but inspect for damage." ‘Ultimately, the decision to reuse frames should be based on the specific needs and preferences of the beekeeper and their bees.’
How many frames should be installed in a hive at a time?
When installing frames in a beehive, it’s recommended to start with 8-10 frames per box. Plastic frames offer durability and ease of cleaning, while foundationless frames allow for natural comb building. Consider the benefits and drawbacks of each before choosing.
Conclusion
Congratulations! You’ve successfully learned how to make beehive frames. You’re now ready to provide a safe and sturdy home for your bees.
Remember, bees are essential to our environment and it’s our responsibility to ensure their well-being. As a fun fact, did you know that a single honeybee can visit up to 2,000 flowers in a day? That means that a colony of bees can pollinate millions of flowers in just one season, making them crucial to the growth and sustainability of our ecosystems.
By providing them with proper housing, we’re not only protecting them but also aiding in the preservation of our planet.
Making beehive frames may seem like a daunting task, but with the right tools and materials, it can be a rewarding experience. Remember to measure twice and cut once, and always prioritize safety.
Your bees will thank you for their new home, and you can take pride in knowing that you’ve contributed to the preservation of our environment.
Happy beekeeping!
Steve's experience in beekeeping is extensive, having managed numerous hives and colonies of bees throughout his career. He is well-versed in all aspects of beekeeping, from hive management and bee behavior to honey production and bee health. Steve is also an advocate for sustainable beekeeping practices, using natural and organic methods to maintain healthy hives and protect the environment.
As a seasoned beekeeper, Steve has also shared his expertise with others by teaching workshops and classes on beekeeping. He is a sought-after speaker and has been invited to speak at conferences and events across the country.
With his wealth of knowledge and experience, Steve is a valuable resource for anyone interested in beekeeping. Whether you are a seasoned beekeeper or just starting out, Steve's insights and advice can help you become a successful and responsible beekeeper.